
Preparing Your Home for Sale in Wake County | 30-Day Plan
October 26, 2026
October 26, 2026
Getting ready to sell your home can make you notice everything you’ve been meaning to do. The scuffed hallway, the crowded garage, the faucet that needs attention. Suddenly, it all feels urgent.
Where should you start? And which projects are actually worth taking on before you list?
If you’re preparing to sell a home in Wake County, a clear plan can help you focus your effort and avoid unnecessary spending. Whether your home is in Cary, Raleigh, or Holly Springs, the goal is to present it thoughtfully, price it appropriately, and make it easy for buyers to understand what it offers.
This 30-day home preparation plan breaks the process into manageable steps. It’s a schedule for getting ready to list, rather than a guarantee of how quickly your home will sell.
Before buying paint or scheduling a renovation, walk through your home with your real estate agent. Discuss your timeline, preparation budget, and the properties buyers may compare with yours.
The right approach depends on the individual home. An established Cary property may need a different preparation plan than a Raleigh townhome or a Holly Springs home competing with nearby new construction.
Start by identifying maintenance concerns, improvements worth considering, and features that deserve more attention in your marketing. Book any needed contractors, cleaners, and photography appointments early.
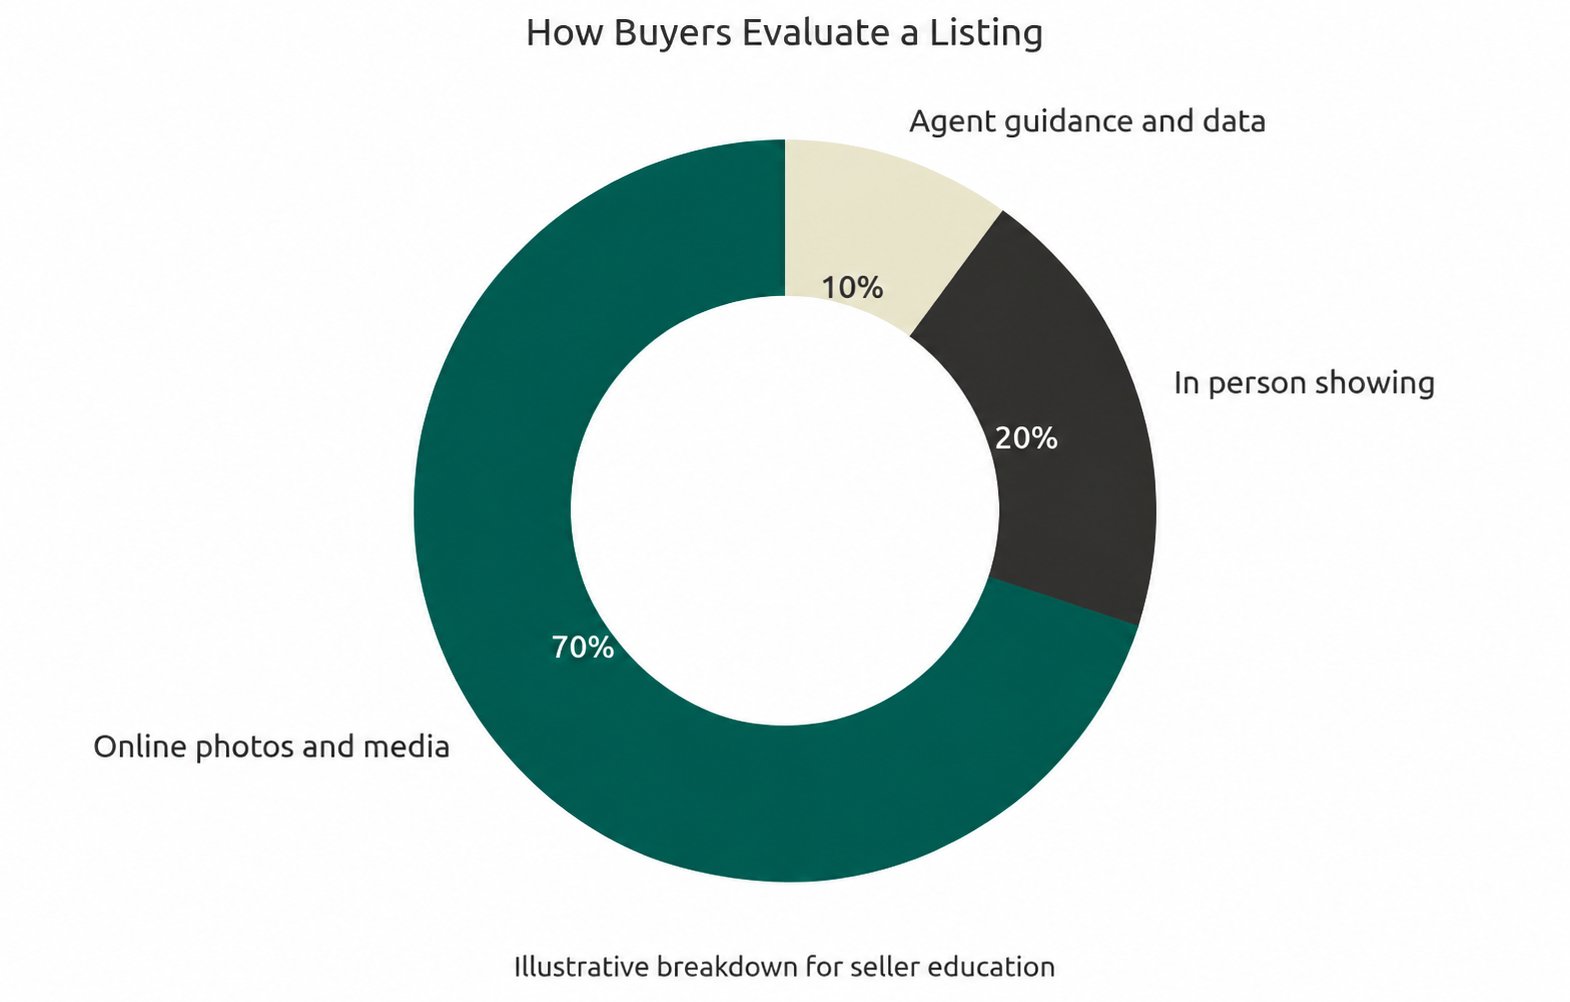
Listing photographs give buyers an introduction to your property. Clear, accurate images help them understand the layout and decide whether to visit.
The showing should build on that first impression. Buyers should be able to move comfortably through the rooms, see the home’s condition, and imagine how they would use the space.
Clutter, poor lighting, lingering odors, and unfinished repairs can distract from those decisions. Thoughtful preparation helps keep the focus on the home.
That doesn’t mean every room needs new furniture or every finish needs replacing. It means making deliberate choices about what will help your property show well.
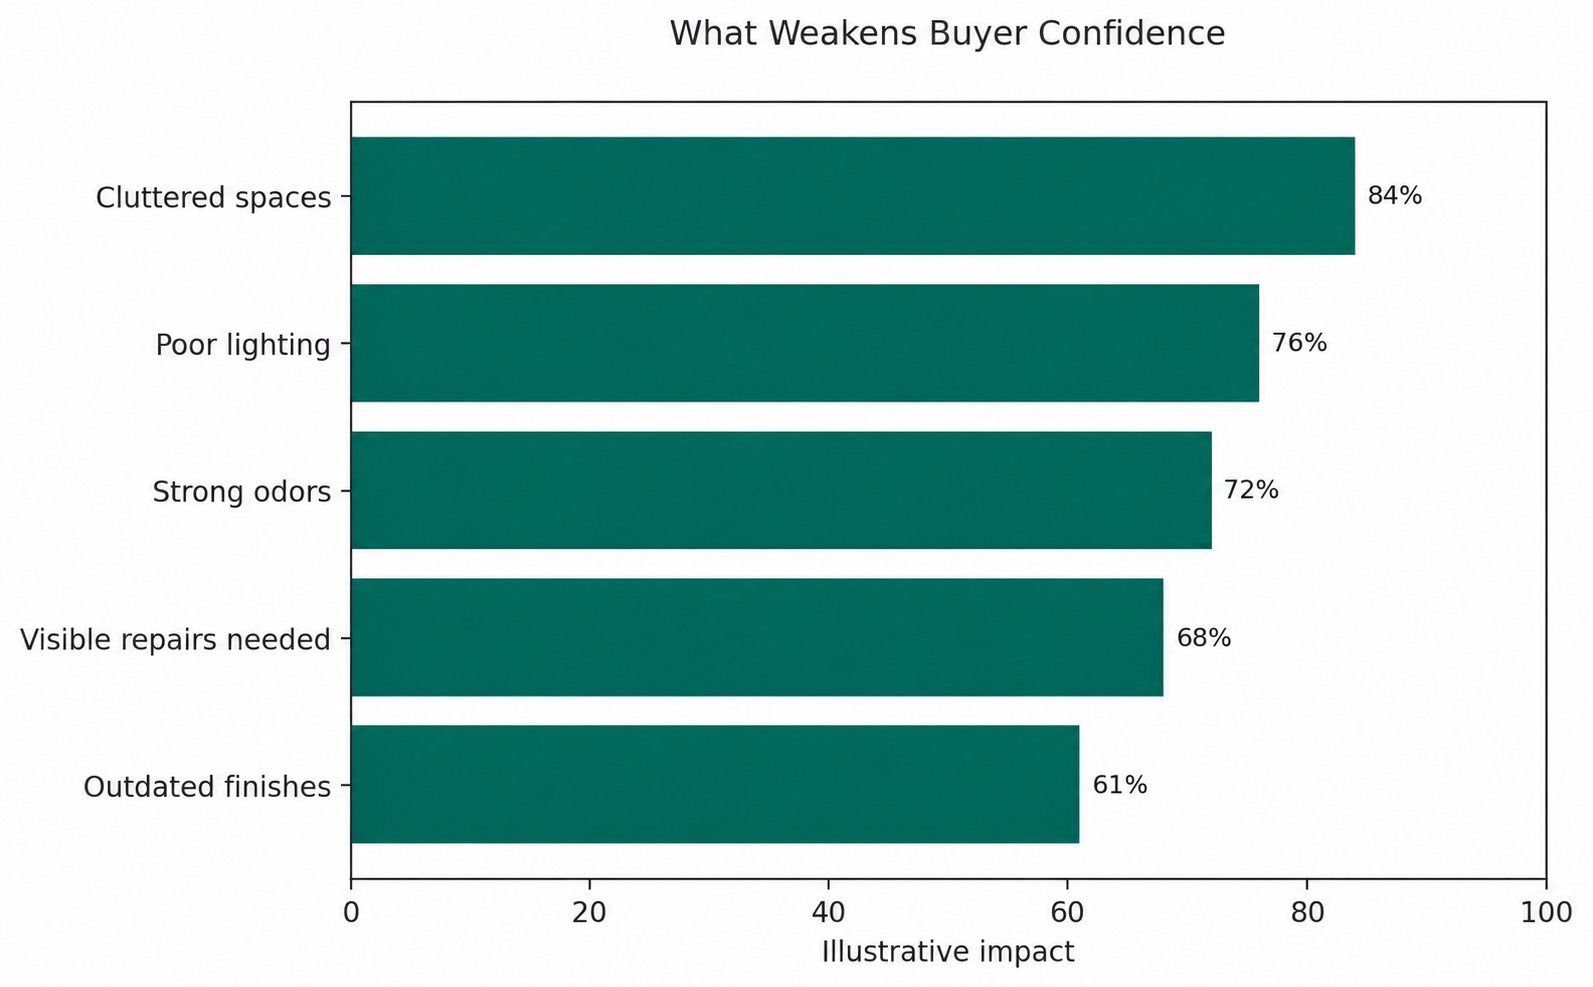
Small issues can create outsized hesitation for buyers, especially in competitive Wake County price points.
Days | Your focus |
|---|---|
1–7 | Improve lighting, organize paperwork, and begin preparing rooms |
8–14 | Simplify living spaces, storage, and personal displays |
15 | Pause and review your progress |
16–23 | Address paint, repairs, exterior spaces, and floors |
24–30 | Finish cleaning, prepare for showings, and get marketing ready |
Replace burned-out bulbs and check for inconsistent light colors within each room. Open window coverings and see where additional lighting would help. Discuss fixture replacements before spending money on updates.
Create a folder for available maintenance records, renovation receipts, warranties, HOA information, and a survey if you have one. Note improvement dates and flag any information that needs confirmation.
Test entry keys, check door locks, and discuss showing access with your agent. Make sure gates and other areas buyers may need to see are accessible. Take care of sticking doors or difficult locks.
Pack seasonal decorations, extra appliances, and belongings you won’t need before moving. Arrange storage so boxes don’t crowd rooms or block access to the garage.
Clear countertops, put away toiletries, and clean mirrors and fixtures. Replace worn towels, bathmats, or shower curtains where needed. Keep the room simple and easy to maintain.
Put away excess countertop appliances and remove refrigerator papers and magnets. Clean appliances, cabinet fronts, and work surfaces. Leave buyers enough visual space to appreciate the kitchen’s layout.
Straighten bedding, clear bedside tables, and reduce unnecessary furniture. Start packing excess closet contents. Make sure buyers can walk around the room comfortably and see how the space functions.
Review furniture placement and clear natural walking paths. Tidy visible cords, clean upholstery as needed, and simplify accessories. Let the room’s size and features guide the arrangement.
Clear paperwork and everyday overflow from the table. If the room serves several purposes, simplify the setup so buyers can understand how they might use it.
Remove items you no longer need and create accessible pathways. Keep equipment and important areas visible. Avoid moving all the household clutter into one storage space.
Separate belongings into what you’ll keep, donate, sell, or discard. Schedule pickups or removal so those items leave the property before photography.
Arrange clothing, shoes, and shelving neatly. Pack items you can do without for a few weeks. Buyers should be able to see the available storage without looking past overflowing shelves.
Walk up to your front door as a visitor would. Clear deliveries and shoes, wipe down the door, and check the doorbell and lighting. Give the interior entryway the same attention.
Pack large photo collections, personal paperwork, and décor that dominates a room. Keep enough warmth to make the home inviting while allowing its features to stand out.
Take a breath and look at what you’ve accomplished.
Review the remaining work with your agent, confirm upcoming appointments, and adjust the schedule where needed. If a repair is taking longer than expected, this is the time to address its effect on photography and launch.
Check walls, trim, baseboards, and doors for wear. If touch-ups won’t blend, repainting the full surface may create a more consistent result. Choose colors that work with the home’s existing finishes.
Address loose hardware, dripping faucets, damaged trim, and other identified issues. Have unexplained stains or recurring moisture evaluated rather than covering them up.
Clean the glass, accessible tracks, and screens as needed. Give buyers a clear view of the natural light and the outdoor spaces surrounding your home.
Tidy planting beds, trim overgrowth, and clear walkways. Clean exterior surfaces using appropriate methods. Focus on making the property look cared for rather than starting a major landscaping project.
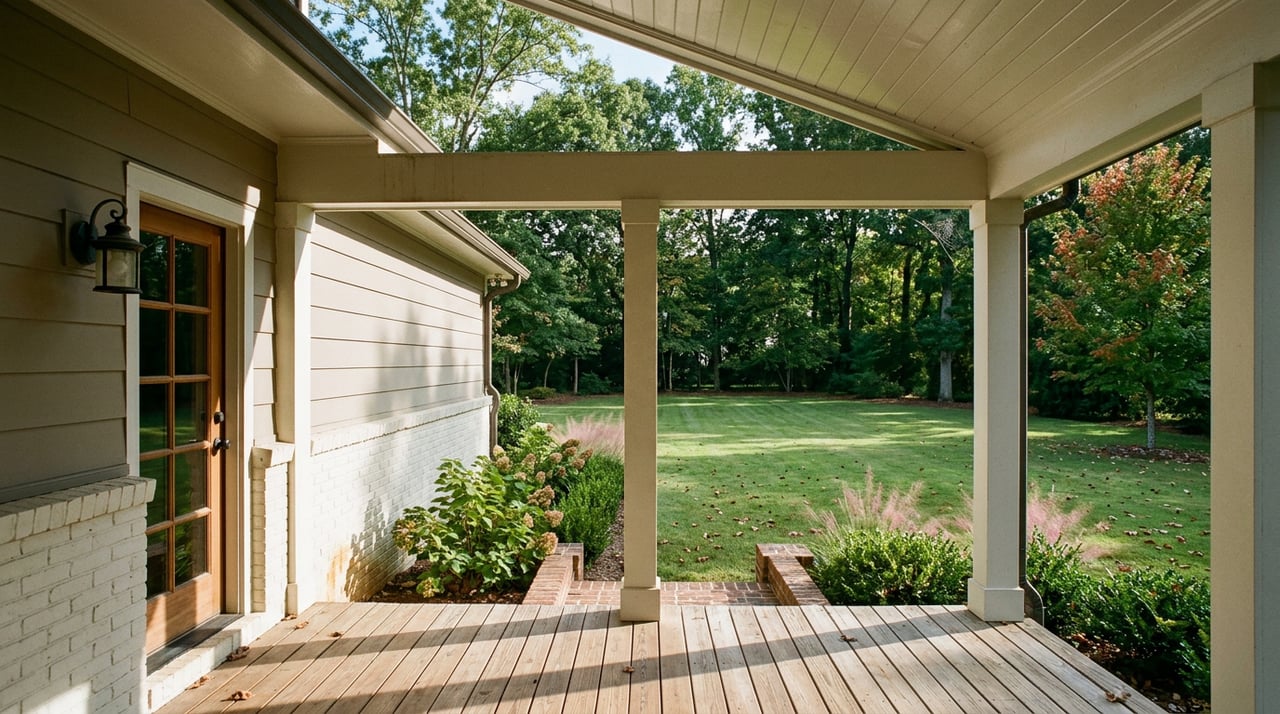
Clean your patio, deck, or screened porch and arrange simple seating. Remove unused equipment and worn accessories. If outdoor living is a feature of your Cary, Raleigh, or Holly Springs home, make its purpose easy to see.
Arrange appropriate cleaning and allow enough drying time. If the carpet is significantly worn or damaged, discuss whether replacement fits your selling plan and budget.
Clean wood, tile, and other flooring with suitable products. Review visible damage before committing to refinishing or replacement. Check that rugs lie flat and don’t interrupt walking paths.
Remove fingerprints and scuffs around handles, switches, and frequently used areas. Look closely at the details you may have stopped noticing while living in the home.
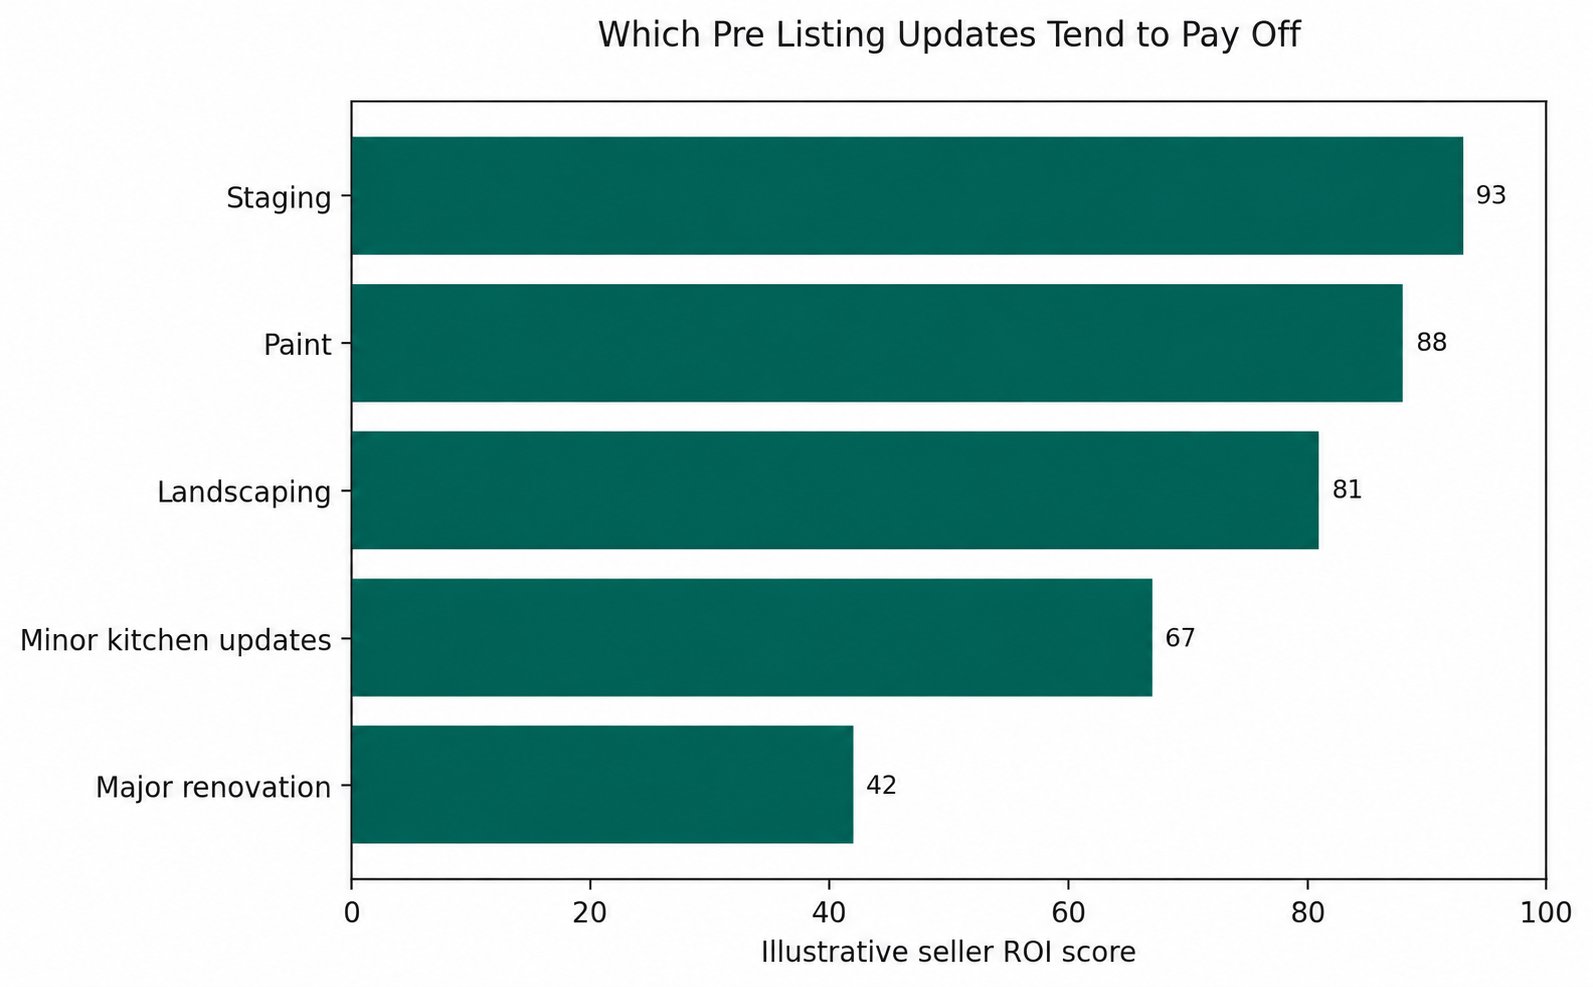
Not every improvement carries the same value. Strategic updates usually outperform expensive over-improvements.
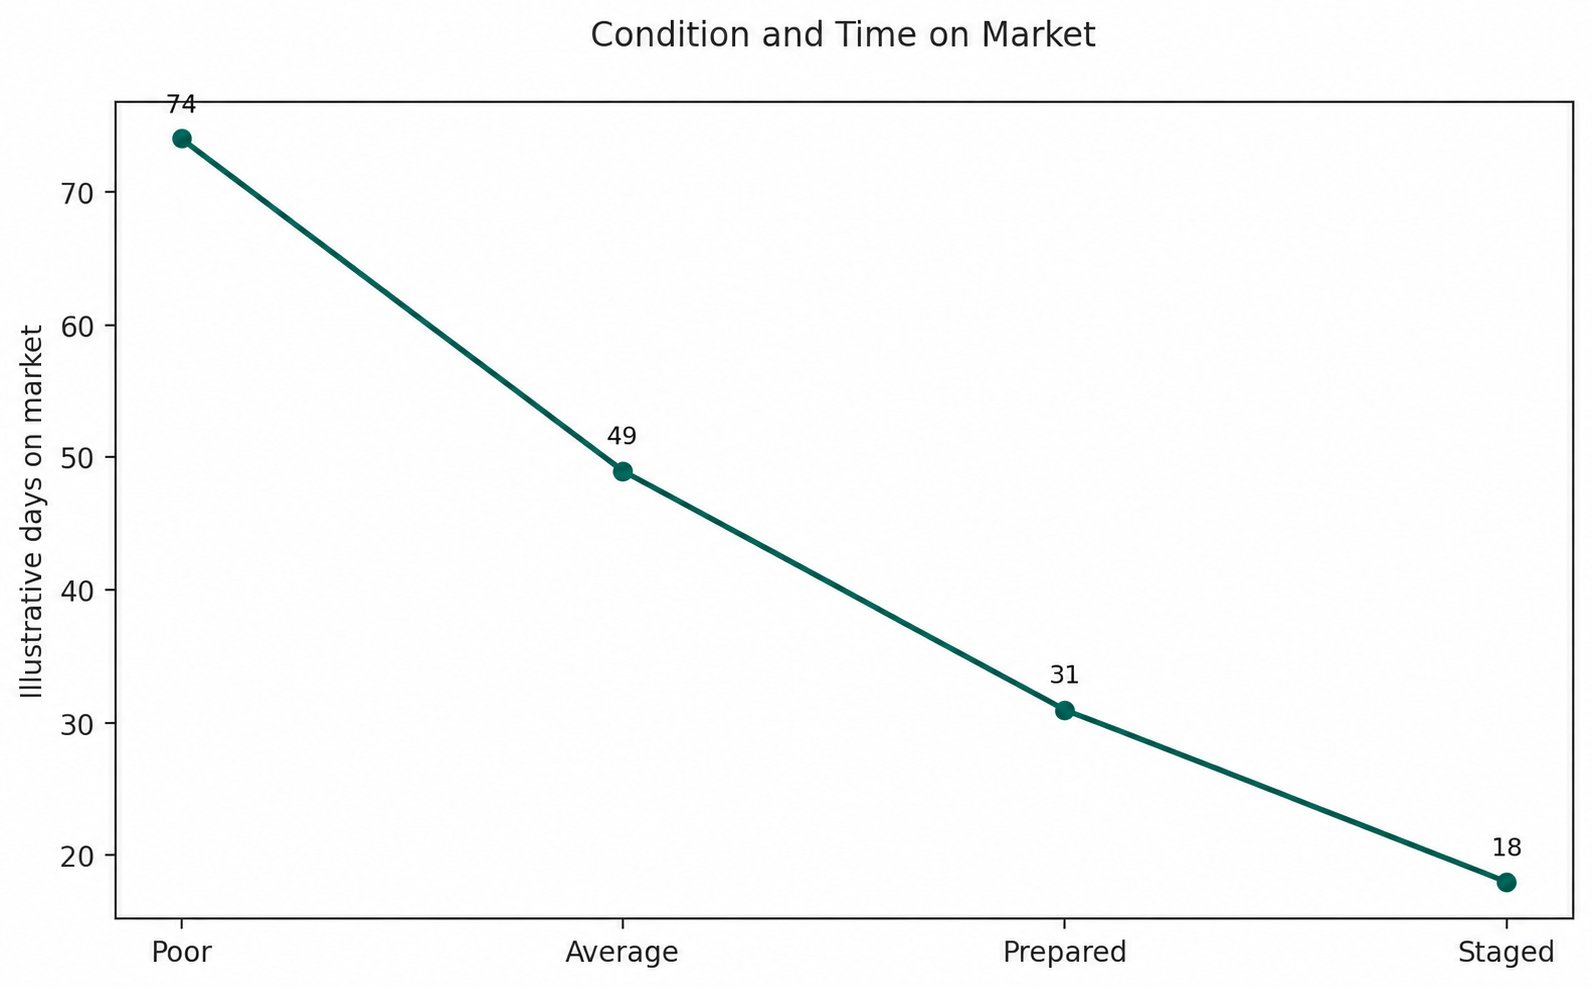
Better presentation and condition can support stronger urgency and less time on market.
Once repair work is complete, focus on baseboards, appliances, fixtures, vents, and window tracks. Give professional cleaners a clear priority list if you’re bringing in help.
Decide how you’ll manage appointments, where pets will go, and how to put away everyday items quickly. Secure valuables, medications, and personal documents before visitors arrive.
Review furniture placement, artwork, and accessories. Staging may involve rearranging what you own or adding selected pieces. Choose an approach that fits your home and preparation budget.
Ask someone who doesn’t live in the home for an honest assessment. Address odor sources, including pet bedding and trash areas, instead of relying on strong candles or sprays.
Start outside and follow the route a visitor would take. Look for unfinished work, crowded areas, or anything distracting. Confirm that the features you want buyers to notice are easy to see.
Have the home ready for your scheduled photography, video, or other marketing appointments. Review the listing description for accuracy and make sure it explains the property’s features clearly.
Allow time for editing and review. Your launch date should accommodate that work.
Confirm the asking price, listing details, showing instructions, and marketing materials with your agent. Once everything is ready, maintain the presentation you’ve created and agree on when to review buyer activity and feedback.
Presentation and pricing should work together.
When selling a home in Wake County, review recent comparable sales and the properties currently available to buyers. Consider differences in condition, layout, lot, and location rather than relying on a countywide average alone.
A carefully prepared home still needs an asking price that makes sense for its competition. The goal is to make informed decisions about both.
The timeline depends on the property and the work involved. This 30-day plan provides a starting point. Some homes need less preparation, while repairs or contractor scheduling may require more time.
Review major projects with your agent before committing. Consider the cost, time involved, and how the finished property would compare with other homes. Targeted repairs and cleaning may be more appropriate than a renovation.
It depends on the home’s layout, furnishings, and condition. Some properties benefit from rearranging and simplifying existing furniture. Vacant homes or rooms with an unclear purpose may need a different approach.
Yes. Packing gradually and establishing a manageable daily routine can help. Plan for showing appointments and keep frequently used items easy to put away.
Preparing Your Home for Sale in Wake County | 30-Day Plan
If you’re thinking about selling in Cary, Raleigh, or Holly Springs, let’s start with your home, your timeline, and what you want your next move to look like.
I can help you prioritize preparation, review the competition, and develop a pricing and marketing plan that fits your property.
Kimberlee Edwards
Howard Hanna Allen Tate Real Estate
Elevate your move.
Stay up to date on the latest real estate trends.
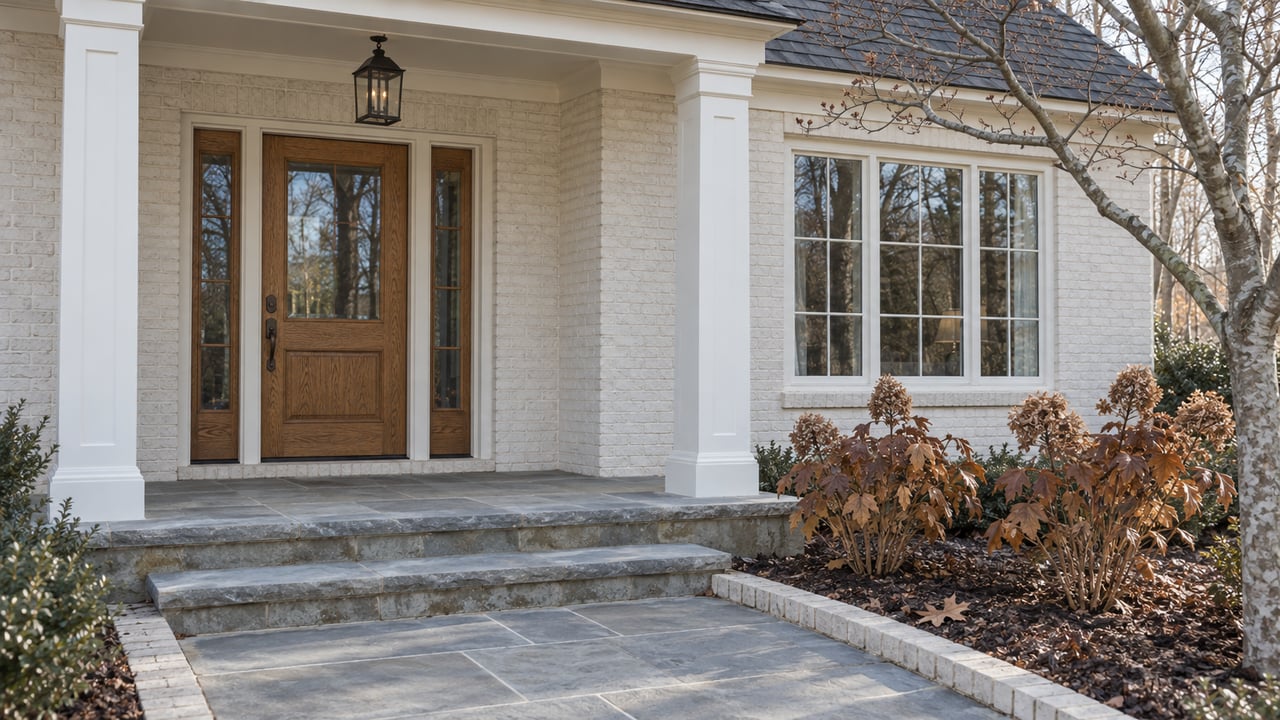
A 30-day guide to preparing, staging, and listing your home in Cary, Raleigh, and Holly Springs
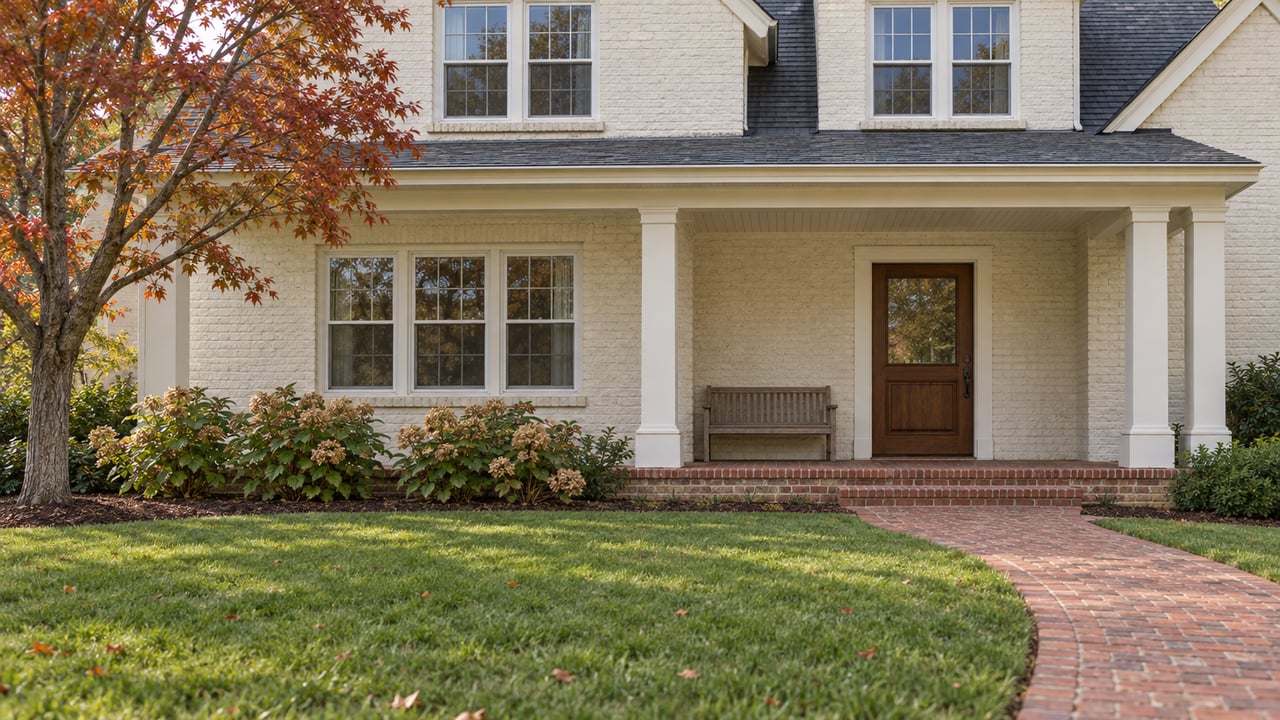


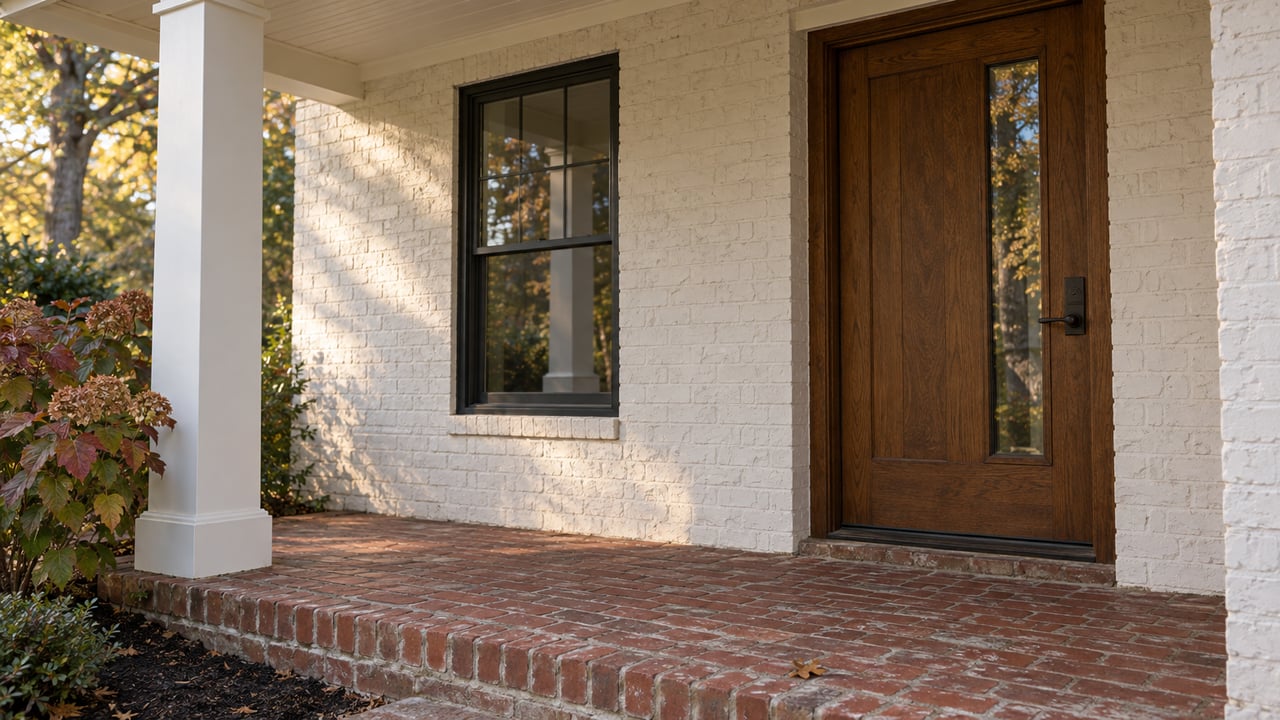

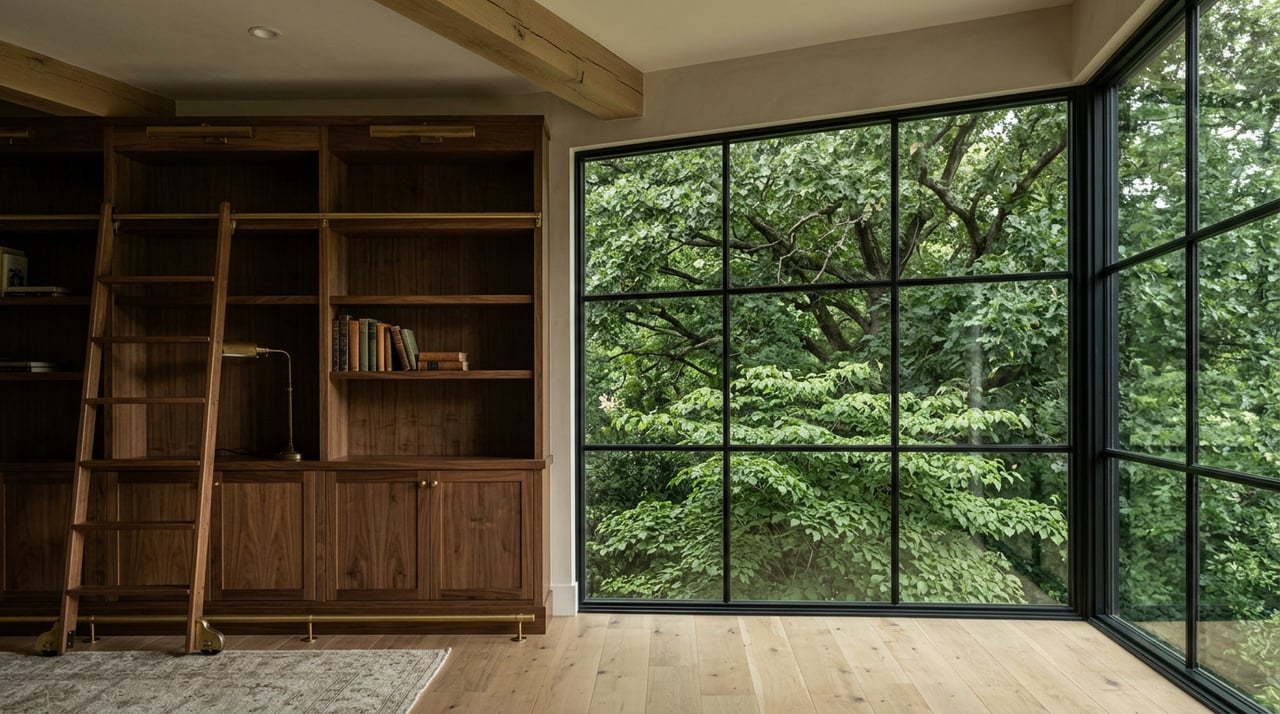
Partner with a trusted advisor focused on strategy, discretion, and results. Gain a competitive edge with expert guidance and tailored solutions.